

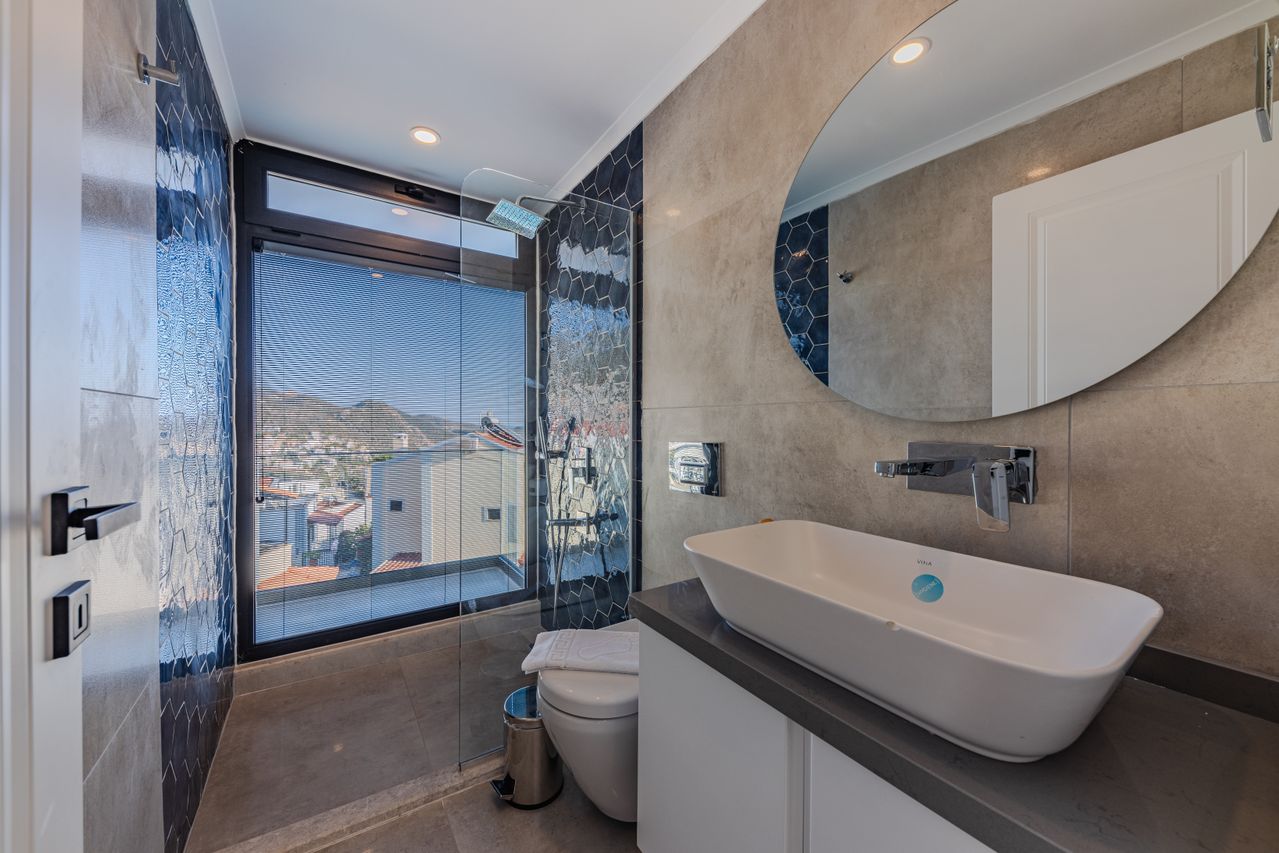
A bathroom renovation can look simple on paper, but budgets often change fast once demolition starts.
As a primary resource for those planning a bathroom renovation in Richmond Hill, this guide explains the hidden costs that quietly turn a low budget remodel into a much more expensive project, and why careful planning matters just as much as finishes and fixtures.
Every week I meet homeowners who walk in confident, holding a shopping list from Home Depot and a screenshot from TikTok saying, “They did it for three grand. Why can’t we?” And I get it. The videos make it look easy. They show the pretty tile, the new vanity, the fresh paint, and a dramatic before and after reveal.
But in Richmond Hill, we aren’t just dealing with TikTok trends; we’re dealing with specific local housing stock. Whether you’re updating a 1980s build in Bayview Hill or a bungalow near Mill Pond, the ‘bones’ of these homes often hide issues that a generic $3,000 budget simply won’t cover.
Why bathroom renovation budgets jump so quickly
In the real world, materials are usually only part of the total renovation cost. The rest comes from the things homeowners rarely see coming before demolition begins: hidden water damage, outdated plumbing, electrical upgrades,
disposal fees, and dozens of small parts that quietly add hundreds of dollars at a time. Those costs do not look dramatic one by one, but together they are exactly how a $3,000 renovation slowly turns into a $7,000 project.
National pricing references such as
HomeAdvisor’s bathroom remodel cost guide
show the same pattern. Materials rarely tell the whole story. Labor, preparation, repairs, and compliance work often take a larger share of the budget than homeowners expect. That is also why timeline problems and cost overruns usually go hand in hand. Once a hidden issue appears, the job often slows down as well as becoming more expensive, which is one reason so many homeowners run into bathroom renovation delays in Richmond Hill
after demolition begins.
The good news is that most of these budget jumps follow a pattern. If you understand where the invisible expenses usually come from, you can make better decisions before the first tile is removed.
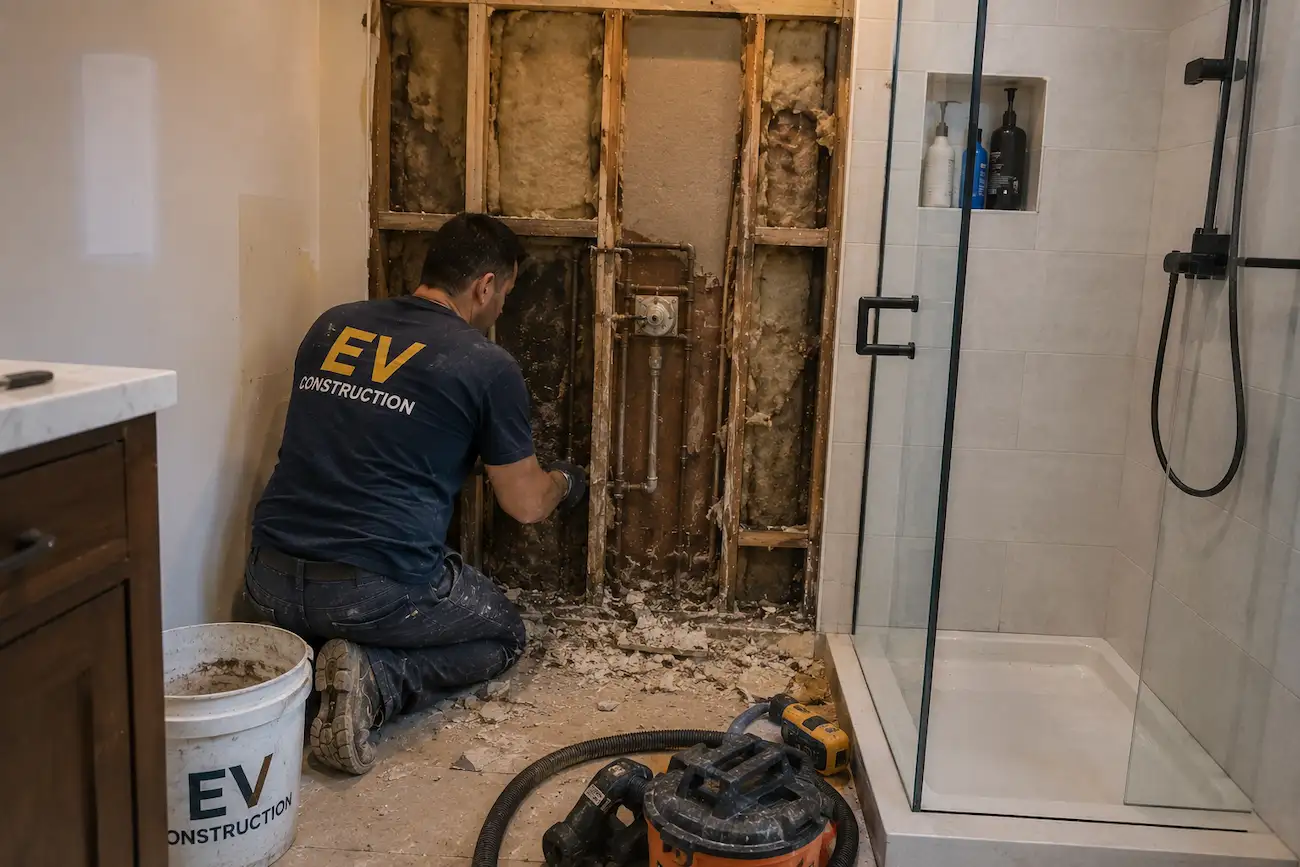
1. Subfloor surprises: the first $1,000 you never planned for
When you remove old bathroom flooring, you are not just taking out tile or vinyl. You are removing the layer that has been hiding years of moisture exposure. Bathrooms deal with constant humidity, small leaks, and condensation.
Over time, that moisture works its way underneath flooring materials, and the damage often stays invisible until demo day.
I have seen bathrooms that looked perfectly fine from above but had rotten plywood around the toilet flange, soft spots near the tub, mold trapped under old vinyl, and uneven surfaces that needed leveling before any new tile could be installed.
None of that shows up in a quick social media makeover video, but it is one of the most common real world reasons a budget jumps early in the project.
Why this becomes a real cost fast
Once the floor is opened, you are no longer dealing with finishes. You are dealing with structure. Replacing damaged subfloor can mean cutting out plywood, rebuilding sections, leveling low spots, and creating a stable base for tile or waterproofing systems. That work adds material cost, labor time, and often more cleanup than expected.
How to cut this cost
Check for moisture before demolition. A simple moisture meter around the toilet, shower, and tub can reveal warning signs before the floor is opened. If readings are high, you can budget more realistically or reconsider the renovation scope.
In some cases, using an overlay flooring system such as high quality LVP or SPC can reduce risk because it avoids full floor demolition. That is not the right answer for every bathroom, but for a small cosmetic update it can be one of the biggest cost savers available.
2. The plumbing butterfly effect: a 6 inch move that costs $1,500
One of the most common questions in budget remodels is, “Can we just move the drain a little bit?” On paper that sounds minor. In reality, plumbing systems are interconnected, and even a small change can trigger a chain reaction.
A slight relocation of a toilet, vanity, or shower drain often means opening the subfloor, adjusting venting, touching old pipes that may already be fragile, and sometimes reinforcing joists if previous work was done incorrectly. What started as a simple layout idea can quickly become plumbing work plus carpentry plus floor reconstruction.
Why layout changes get expensive
Plumbing work is costly mainly because of access and sequencing. To reach the piping, finished materials need to be opened. Once the area is open, any unsafe or outdated condition that is discovered usually has to be corrected before work can continue.
That may include replacing corroded lines, fixing poor venting, or correcting old DIY work that never met code in the first place.
This is also where contractor experience matters. Homeowners often underestimate how much cost is tied to planning decisions, which is exactly why choosing the right professional early can protect the budget. A good contractor can spot a “small” change that will actually trigger major plumbing work, which is one reason it helps to understand how to choose a bathroom renovation contractor in Richmond Hill before the design is finalized.
How to cut this cost
Freeze the footprint whenever possible. Keeping the toilet, shower, and vanity in the same general position avoids drain relocation,
vent changes, structural repair, and extra inspection risk. In many bathroom renovations, this one decision is the difference between
staying close to budget and blowing past it.
“In the York Region, we also have to account for water hardness. If your Richmond Hill home hasn’t had a water softener, we often find significant mineral scale buildup inside older copper pipes during demolition. Replacing these brittle sections isn’t a ‘luxury’—it’s a necessity to prevent future leaks behind your expensive new tile.”
3. Hidden fixture and finish costs: the $200 faucet that turns into $600
This is one of the sneakiest renovation costs because it feels like the shopping is already done. A homeowner buys a faucet, shower trim,
or vanity fixture and assumes that item covers the cost of that part of the project. But fixtures rarely work on their own.
A faucet may still need supply lines, a drain assembly, a P trap, mounting hardware, adapters, and sometimes a separate valve.
A shower trim kit may look complete in the box but still require a rough in valve or other compatible parts sold separately.
One missing component creates another trip to the store, and multiple trips create labor delays as well as extra cost.
Why finish costs add up so quietly
Small parts do not look expensive individually. A valve here, a mounting kit there, a few adapters, upgraded supply lines,
and suddenly the original fixture budget has doubled or tripled. This is especially common when homeowners mix products from different brands or buy online without confirming exactly what is included.
This is also where budget mistakes happen. Many of the most frustrating overruns do not come from one huge surprise. They come from ten smaller purchases no one planned for properly. That is why these overlooked parts often belong on the same list as other bathroom renovation mistakes that cost homeowners time and money.
How to cut this cost
Buy complete kits whenever possible and verify every required part before installation day. Contractor grade brands are often a smart choice because they tend to be easier to install, easier to maintain, and less likely to require specialty components that slow the job down.
4. Permits and electrical upgrades: touch a wire, trigger a bigger job
Electrical work is one of the fastest ways bathroom renovation budgets increase. Bathrooms are high risk environments because water and electricity exist in the same space, so modern code requirements are strict for good reason.
Once wiring is altered, many bathrooms must be brought up to current safety standards. That can mean a dedicated 20 amp circuit, GFCI protection,AFCI protection, updated breakers, and in some cases new wiring runs through finished walls. If the electrical panel is already full, the issue
can go beyond the bathroom itself.
Why this catches homeowners off guard
A homeowner may only be thinking about replacing a light or adding a nicer vanity fixture, but the moment wiring is moved or opened, the scope can change. Electricians cannot legally ignore unsafe conditions once they find them. If old connections, overloaded circuits, or outdated wiring
are discovered, the repair becomes part of the renovation whether it was in the original budget or not.
If the project is local, permit and inspection requirements matter too, which is why many homeowners look into
the Richmond Hill bathroom permit guide
before changing plumbing, wiring, or structural elements.
How to cut this cost
Avoid unnecessary electrical changes when working with a tight budget. Replacing fixtures in the same location is usually much more predictable than moving switches, adding outlets, or changing circuit loads. The more you alter rough electrical, the more the project can expand.
5. Disposal and logistics: the $500 nobody talks about
Demolition always creates more waste than people expect. A small bathroom can produce broken tile, old drywall, a vanity, a toilet, a tub or shower base, and bags of grout, thinset, and debris. None of that simply disappears when the room is emptied.
Even if the demolition is DIY, someone still has to bag the mess, load it, transport it, and pay to dispose of it properly. This part of the budget gets ignored all the time because it is not visible in the finished bathroom, but it is very real once demo starts.
Why disposal costs get underestimated
Dumpster rentals often come with delivery fees, pickup fees, and weight charges for heavy materials like tile and tubs. Haul away services charge per item.
A “cheap” DIY demo often stops feeling cheap once disposal and labor are added up honestly.
How to cut this cost
For small bathrooms, a Bagster or smaller disposal option can be more cost effective than a full dumpster. If you are removing a heavy cast iron tub, selling it for scrap may offset part of the disposal cost. It is not glamorous, but it is one of the easiest hidden expenses to plan for ahead of time.
Pinterest vs reality: a clear cost breakdown
This is where expectations and real world construction usually separate. The “dream” budget often focuses on visible finishes. The real budget includes what happens once walls and floors are opened and the room has to be rebuilt properly.
| Expense category | Pinterest estimate | Real world cost | Smarter strategy |
|---|---|---|---|
| Demolition | $0 DIY | $400 | Plan disposal and hauling before demo starts |
| Flooring | $300 | $900 | Inspect for moisture and consider overlays where appropriate |
| Plumbing | $200 | $800 to $1,500 | Keep the layout as close to the original as possible |
| Fixtures | $200 faucet | $600 installed cost | Buy complete kits and verify all parts in advance |
| Contingency | $0 | $1,000 plus | Budget for what you cannot see before demo |
How to keep a bathroom renovation under control
A true low budget bathroom renovation is possible, but only if the project is managed with contractor level discipline. The homeowners who stay on budget are not always the ones who spend the least. They are the ones who make fewer reactive decisions once demolition has already started.
Freeze the layout early
Moving plumbing is one of the fastest ways to increase both cost and complexity. If you are aiming for a lower budget remodel, keeping the footprint close to the original is one of the smartest financial decisions you can make.
Finalize purchases before demo day
Do not assume you can figure out valves, trim pieces, adapters, or accessories later. Late decisions create store runs, schedule gaps, and expensive delays.
Respect code and permits before they become a problem
Many “cheap” bathroom renovations become expensive because compliance work gets discovered too late. Understanding permit scope and choosing the right contractor
early usually costs less than correcting mistakes after rough work has already started.
Keep a contingency no matter how small the project feels
Bathrooms may be small, but they are dense. They combine plumbing, electrical, waterproofing, and finish work in one tight space. That is why even a minor remodel
benefits from a realistic buffer for hidden issues.
FAQ about hidden bathroom renovation costs
Why does a bathroom renovation cost more than the materials alone?
Materials are only one part of the budget. Labor, demolition, repairs,
plumbing adjustments, electrical upgrades, waterproofing, disposal, and
small installation parts often add more than homeowners expect. The
visible finishes are only the surface layer of the project.
What is the most common hidden cost in a bathroom renovation?
Hidden water damage is one of the most common surprises. Rotten
subfloor, damp framing, old leaks around the toilet, and failed
waterproofing often only become visible after the floor or walls are
opened.
Can I really renovate a bathroom for $3,000?
It is possible for a very limited cosmetic update if the layout stays
the same, no major repairs are needed, and you avoid moving plumbing or
electrical. Once hidden damage, code upgrades, or fixture compatibility
issues appear, the budget usually rises quickly.
Does moving a toilet or shower a little bit really cost that much more?
Yes, even small plumbing moves can trigger bigger work. Accessing the
drain often means opening floors, adjusting venting, touching old
piping, and sometimes making structural corrections before the room can
be rebuilt properly.
How much contingency should I keep for a bathroom renovation?
A contingency of around 10 to 20 percent is a common starting point,
especially in older homes. Bathrooms hide a lot behind small surfaces,
so even a modest buffer can reduce stress when surprises show up after
demolition begins.
Final thoughts
A bathroom renovation does not become expensive because homeowners are careless. It becomes expensive because bathrooms hide a lot of complexity inside a very small footprint.
The visible part of the project is only the finish layer. The real budget lives underneath it in the structure, rough systems, compliance requirements, and logistics.
The best way to control costs is not chasing the cheapest inspiration photo. It is planning like a contractor before demo starts, keeping the layout as stable as possible,
verifying every part, and leaving room for the things you cannot see yet. That is what separates a manageable renovation from one that spirals.
Planning a bathroom renovation in Richmond Hill or the York Region? Contact us today for a free on-site consultation and let’s discuss how to elevate your ceiling design.

2 Responses
I never thought about how disposal and logistics could quietly add to a bathroom renovation budget. Even when the main costs are planned, these smaller details can really throw off a timeline and expenses. It’s a good reminder to factor everything in, not just the finishes and fixtures.
That’s a great point — things like disposal, material delivery, and site access often don’t get enough attention during the planning stage. Even when the main work is scoped out, these behind-the-scenes details can quietly affect both the timeline and the final cost. We usually encourage factoring them in early, because they tend to be the difference between a smooth renovation and one with unexpected delays or add-on expenses.